How to use an Instant Pot? That’s exactly what I asked myself the day I opened the box, stared at the buttons, and thought… what have I gotten myself into?
If you’re here, I’m guessing you’re in the same boat. Maybe you just got one as a gift, or finally gave in to the hype and bought one during a sale. Either way, the moment it’s sitting on your counter, blinking at you like it knows you’re new here, you realize you need more than just the manual.
Don’t be overwhelmed learning how to use an Instant Pot is easier than it looks.
Let me save you the long, confusing rabbit hole I went down.
When I first started using my Instant Pot, I was nervous. Pressure cooking? Steam valves? It all sounded like something that could go wrong fast. But here’s the truth: once you understand the basics, it becomes one of the easiest and most reliable tools in your kitchen. That’s why I wrote this guide the way I wish someone had explained it to me.
By the end of this post, you’ll know exactly how to use an Instant Pot with confidence.
You’ll learn how to use each core function, how to avoid common mistakes, and what meals to start with as a complete beginner. No fluff. No unnecessary jargon. Just clear steps, tips from personal trial and error, and some beginner recipes that won’t make you feel like you need a culinary degree.
Ready to actually use your Instant Pot instead of letting it collect dust on your shelf?
Let’s do this together, step by step.
Table of Contents
Table of Contents
Instant Pot Basics: How to Use an Instant Pot Safely from the Start
How to use an Instant Pot for the first time can feel overwhelming. I remember clearly the moment I unboxed mine. The excitement faded the second I saw all the buttons and options. If you’ve been there, you’re not alone. That’s exactly why I want to walk you through the basics step by step, like someone should have done for me.
If you’re wondering how to use an Instant Pot for the first time, it all starts with getting familiar with your model and setup.
Getting your Instant Pot set up properly is more than just plugging it in. There are a few things that make all the difference in whether your first dish turns out great or goes straight to the compost bin. When you understand what’s happening inside the machine, it starts to feel a lot less intimidating and way more like a tool you’ll use every week.
What You Need to Know Before Cooking
Before pressing anything, take a breath. This machine may look like a spaceship but it’s designed for everyday cooking. The most important things to check are the lid, the seal, and the liquid. Your lid must close securely with a locking sound, the silicone ring should be snug inside its groove, and you always need some liquid inside the pot to create pressure.
Your first test run should be with water only. Just a cup, sealed lid, and a short pressure cycle. No ingredients, no guessing. This lets you see what normal operation looks like without risking food or frustration. When I did that, it took the fear away. It showed me how the float valve rises, what the pressure sounds like, and when it’s safe to open the lid again.
Learning how to use an Instant Pot doesn’t require memorizing a dozen buttons. It just takes understanding the sequence: seal it, add enough liquid, pick the time, and let pressure do the work.
Minimum Liquid and Fill Lines Explained
Here’s something I wish I had known sooner. Without enough liquid, your Instant Pot simply won’t work. It needs steam to create pressure and steam comes from liquid. The safe minimum is one cup. You can use water, broth, or any thin liquid that won’t burn.
Inside the pot, you’ll find two markings. The lower one is the halfway mark. That’s your limit when cooking ingredients like rice, beans, or grains that expand. The upper one is the two-thirds line, which you should never exceed with liquid or food combined.
My first soup went above that line. The result wasn’t just a mess inside the pot. It actually pushed starchy foam through the valve, and cleaning that wasn’t fun. Since then, I respect those marks like speed limits. They’re not suggestions. They’re what keep your cooking clean and safe.
Even when using a separate container inside the pot for recipes like rice or desserts, known as pot-in-pot cooking, the base still needs liquid. The Instant Pot only cares about building steam. If it can’t, it won’t cook anything at all.
For the official step-by-step instructions, you can also check the Instant Pot user guide on their website
Mastering Instant Pot Functions: How to Use an Instant Pot’s Core Buttons and Modes
How to use an Instant Pot goes far beyond pressing one button and hoping for the best. The truth is, the front panel looks more complicated than it really is. I still remember how hesitant I was to press anything that said “manual” or “pressure cook.” It felt like launching something into orbit. But the more I cooked, the more I realized only a few buttons actually matter for everyday use.
Not all Instant Pot models have the exact same layout. Some have a dial, others just buttons, and a few have smart screens. But they all follow the same logic. Once you know what each core function does, you’ll stop fearing the front panel and start controlling it like a pro.
The Buttons That Matter (And the Ones You Can Ignore)
Before jumping into recipes, understanding how to use an Instant Pot properly means knowing what each button does and how it works.
The main button you’ll use most often is either labeled “Pressure Cook” or “Manual.” They do the same thing. This is how you start a normal pressure cooking cycle, and it’s where most recipes begin. You’ll also notice + and – buttons nearby, which let you set the cooking time based on the recipe.

Then there’s “Keep Warm” and “Cancel.” Keep Warm activates automatically after a cooking cycle finishes, keeping your food hot until you’re ready to eat. Cancel stops any program currently running and is also how you reset the Instant Pot if something goes wrong.
Now let’s talk about “Sauté.” This is one of the most underrated features. It lets you brown meat, soften onions, or reduce sauces directly in the Instant Pot before or after pressure cooking. That means fewer pans to wash and deeper flavor in your dishes. The only thing to remember is never to sauté with the lid on. It’s an open-lid function, just like using a normal pan.
Finally, some models include “Adjust” or “Pressure Level” buttons. Adjust toggles the intensity of the Sauté function from low to high. Pressure Level lets you switch between high and low pressure, though most recipes use high pressure by default. If you have a LUX model, you won’t see that button because it only cooks at high pressure.
One of the best things about learning how to use an Instant Pot is that cleanup is minimal compared to traditional stovetop cooking.
Why I Stopped Using the Pre-Programmed Buttons
You’ll notice buttons like Soup, Rice, Bean/Chili, and even Cake. They sound helpful, but in practice, I found them confusing. These presets use fixed cooking times that may not match your specific ingredients or portions. I tried using the Rice button once and ended up with mushy grains. Since then, I’ve used the manual mode for full control.
The beauty of learning how to use an Instant Pot is realizing you don’t need to rely on automated modes. Once you understand how time, pressure, and liquid work together, you’ll get better results from manual settings. It gives you the freedom to tweak recipes, adjust for portion sizes, and avoid unexpected outcomes.
Eventually, pressing “Pressure Cook” followed by 12 minutes for chicken or 22 for stew becomes second nature. You won’t even think about it. And that’s when cooking with the Instant Pot shifts from intimidating to intuitive.
Sealing and Releasing Pressure: How to Use an Instant Pot Safely Every Time
How to use an Instant Pot isn’t just about choosing the right settings. A big part of mastering it is knowing how to close it properly and release the pressure without getting a face full of steam. This part scared me more than anything else when I started. The idea of high-pressure steam escaping near my hands? I was sure I’d mess it up. But once I understood the sealing and venting system, it became a safe and simple habit.
The Instant Pot uses a float valve and a steam release valve to control pressure. You’ll hear them click, rise, drop, and hiss but these sounds are all perfectly normal. The key is knowing what to expect so it doesn’t surprise you every time.
Learning how to use an Instant Pot safely means getting comfortable with sealing the lid and managing the pressure release correctly.
Closing and Sealing the Lid the Right Way
Let’s start with the lid. On top, you’ll see a steam release valve. It should be loose, and that’s normal. When you close the lid, turn it clockwise until you hear a satisfying chime. If you don’t hear it, check that it’s lined up correctly. The arrows on the lid and the base help guide the alignment.
Once the lid is closed, you must set the steam release valve to “Sealing.” That step is easy to forget, especially when you’re rushing. I did it once and wondered why nothing was cooking. The Instant Pot needs that sealed environment to build pressure. No seal means no pressure, and no pressure means no cooking.
After a few tries, this became muscle memory. Close the lid, twist, check the valve position, and walk away. You don’t need to hold it or stay close. It handles the rest on its own.
Understanding Natural and Quick Pressure Release
Once the cooking time ends, the Instant Pot beeps and enters Keep Warm mode automatically. But that doesn’t mean it’s ready to open. There’s still pressure inside, and removing the lid too soon can be dangerous.
There are two ways to release that pressure. Natural Release means letting the Instant Pot sit until the pressure drops on its own. This can take 10 to 20 minutes depending on what’s inside. It’s best for foamy foods or when the pot is very full. I often use this method for soups or beans so the contents don’t splatter through the valve.
Quick Release is more active. You manually turn the valve from Sealing to Venting. Steam bursts out instantly, so keep your face and hands away. I use the handle of a long spoon to nudge the valve. That way, I stay safely back while it vents. This method is great when cooking delicate foods like vegetables or chicken that could overcook quickly.
Over time, you’ll know when to use each release type just by looking at the recipe or thinking about what’s inside. Learning how to use an Instant Pot safely is about respecting the pressure and trusting the process. Once you do, the whole thing feels much less intimidating.
Cooking Times and Portion Adjustments: How to Use an Instant Pot for Any Recipe
How to use an Instant Pot becomes even more practical once you start tweaking recipes. One of the most common questions I had was about cooking times and how they change depending on what or how much you’re cooking. At first, I thought doubling the ingredients meant doubling the time. That seemed logical, but I quickly learned it doesn’t work that way with pressure cooking.
The Instant Pot doesn’t cook by volume. It cooks based on the thickness or density of what’s inside. That’s why a single large sweet potato takes longer to cook than five small ones. Understanding that changed everything for me. I stopped guessing and started paying attention to size, not quantity.
Figuring out how to use an Instant Pot for different portion sizes is key to avoiding overcooked or undercooked meals.
Instant Pot Cooking Times: What Really Matters
The actual pressure cooking time is often only part of the total time involved. You have to factor in the time it takes to build pressure and the time it takes to release it. The build-up usually takes about ten minutes but can take longer if the pot is full or the ingredients are cold.
Most beginner recipes come with a set time, like 10 minutes for chicken breasts or 22 minutes for beef stew. But here’s the part I wish someone had told me sooner: those times assume a standard size. A thick frozen chicken breast won’t cook the same as a thin fresh one. The thickness changes the internal cooking time, even if the recipe doesn’t mention it.
That’s why using an Instant Pot well means checking more than just the numbers. Look at your ingredients. Are they thick? Dense? Still frozen? The cooking time might need a slight bump. When in doubt, start with the recipe’s time and add a few minutes next time if needed. Better slightly undercooked and correctable than overdone and dry.
Doubling Recipes Without Doubling Mistakes
When I first tried to double a soup recipe, I panicked about the time. Should I double it too? What about the pressure release? The answer surprised me. You can double almost any Instant Pot recipe as long as you don’t exceed the fill line. The cooking time usually stays the same.
The only exception is when the size of a single piece of food changes. If you’re using larger chunks of meat or whole potatoes instead of diced, they’ll take longer to cook through. But if you’re just making more of the same thing, like doubling shredded chicken or beans, keep the time as written.
This is where using an Instant Pot becomes second nature. You start trusting the machine, learning how it responds to size and texture instead of guessing wildly. You also learn how forgiving it can be. A few extra minutes rarely ruin a dish, but undercooking once teaches you everything.
First Recipes to Try: How to Use an Instant Pot with Simple Beginner Meals
How to use an Instant Pot becomes much easier when you stop reading about it and start actually cooking with it. That moment when you lift the lid and smell something you made, with hardly any effort, changes everything. The fear disappears and gets replaced by something close to pride. But for that to happen, you need the right first recipes. Not too complex, not too bland, and absolutely no long lists of ingredients.
The first dish I ever made was hard-boiled eggs. It sounds silly, but it was a safe start. No risk of overcooking, no pressure to impress anyone. That small win gave me the confidence to try more. From there, I went straight into shredded chicken, rice, and basic soups. What matters most is choosing recipes that teach you how the Instant Pot behaves, so you can build real instincts fast.
This is one of the easiest ways to learn how to use an Instant Pot while getting a meal on the table fast.
Simple Starter Recipes That Always Work
Instant Pot hard-boiled eggs are a classic beginner move. You pour in a cup of water, set the trivet, add eggs, pressure cook for five minutes, and then release. The shells come off so easily it feels like a magic trick.
Shredded chicken is another go-to. I use frozen chicken breasts, add a little broth, set it for twelve minutes, and let the pressure release naturally. What comes out is juicy, pull-apart chicken you can use in wraps, salads, or bowls all week long.
Knowing how to use an Instant Pot makes this shredded chicken recipe ridiculously simple, even if you’re new to pressure cooking.
Brown rice was where I learned the beauty of walk-away cooking. I used to watch the stove, stir constantly, and hope it wouldn’t stick. The Instant Pot fixed that. Now I just add water and rice, press start, and do something else while it cooks perfectly on its own.
Soup is where things really started to feel like I knew what I was doing. A few chopped vegetables, some noodles, broth, a bit of seasoning, and ten minutes later I had dinner. It tasted homemade and felt like I’d finally cracked the code.
How to Use an Instant Pot
Ingredients
- 2 large chicken breasts fresh or frozen
- 1 cup chicken broth or water
- ½ teaspoon salt
- ½ teaspoon garlic powder
- Optional: pinch of black pepper herbs of choice
Instructions
- Place chicken breasts in the Instant Pot insert.
- Add broth or water and seasonings.
- Close the lid, turn valve to Sealing, and select Pressure Cook for 12 minutes.
- Allow Natural Pressure Release for 10 minutes, then quick release any remaining pressure.
- Remove chicken and shred using two forks.
- Return shredded chicken to juices if desired for extra flavor.
Notes
- Calories: 165 kcal
- Protein: 31 g
- Fat: 3.5 g
- Carbohydrates: 0 g
- Fiber: 0 g
- Sugar: 0 g
- Sodium: 350 mg (may vary depending on broth)
- Saturated Fat: 1 g
One-Pot Instant Pot Meals for Busy Days
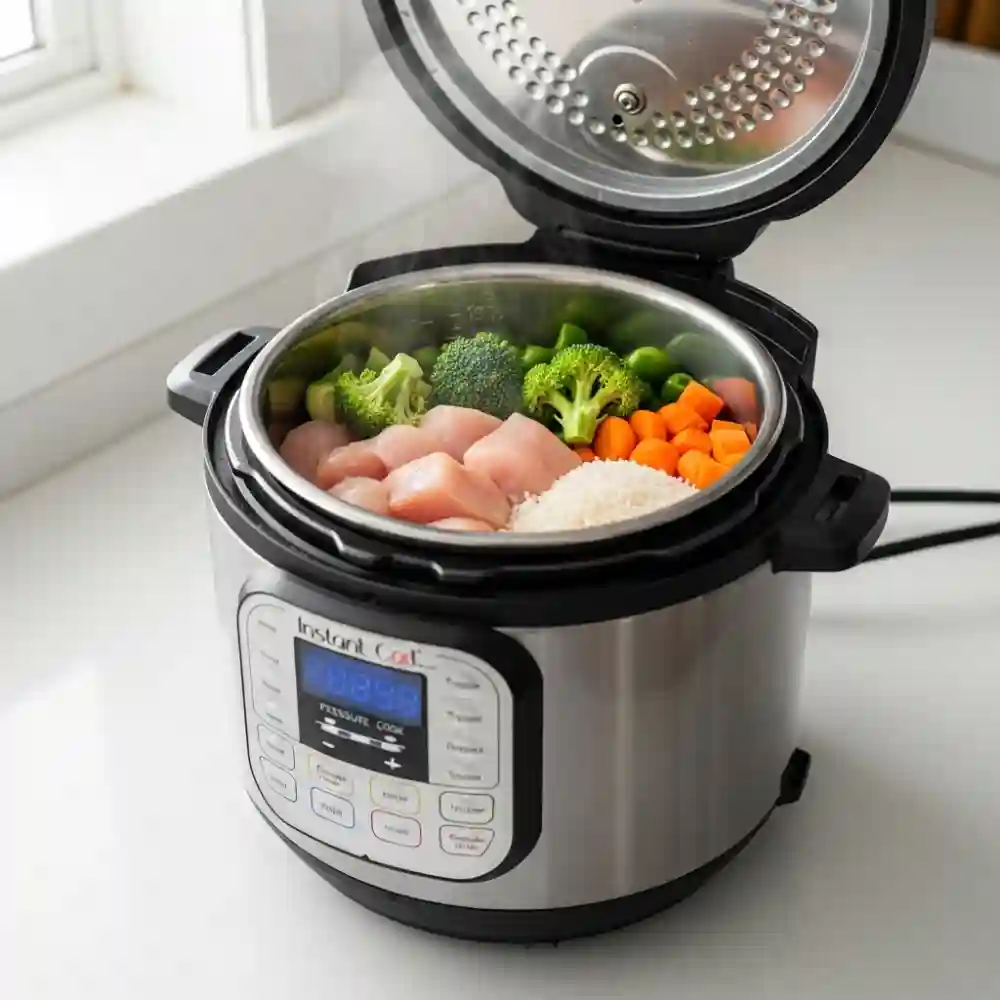
One of the biggest benefits of learning how to use an Instant Pot is how easily you can create full meals in one shot. I’ve made beef stew, lentil curry, and even chicken and rice with just a few steps. You sauté directly in the pot, add your ingredients, seal it, and let it do its thing.
It’s perfect for weeknights when cooking feels like a chore. I’ve walked in the door tired, thrown a few things in the pot, and sat down to eat a full meal twenty-five minutes later. No babysitting, no stirring, no piles of dirty dishes.
The Instant Pot taught me that cooking doesn’t have to be exhausting. It just has to be smart. And when you have a few basic recipes in your back pocket, it becomes a tool you actually want to use, not just something that takes up counter space.
Beyond the Basics: How to Use an Instant Pot for Veggies, Meal Prep, and More
How to use an Instant Pot goes far beyond rice and chicken. Once you’ve mastered the basics, the real fun starts. That’s when you begin testing what else it can do steaming vegetables in minutes, prepping whole meals in jars, or layering ingredients using pot-in-pot methods. These techniques are what turned my Instant Pot from a simple cooker into an everyday multitool.
At first, I stuck to the recipes everyone talks about. But over time, I realized there was so much more I could do, especially with simple prep tasks like cooking broccoli or batch-making breakfasts for the week. The more I explored, the more confident I became in adapting recipes to my own needs and schedule.
Once you understand how to use an Instant Pot beyond basic recipes, you unlock its real versatility.
Steaming Vegetables and Healthy Sides
If you’ve never tried steaming vegetables in an Instant Pot, you’re missing out. It’s one of the fastest ways to get perfectly cooked greens, especially when you’re in a rush or want a healthy side dish without firing up the stove.
I usually place chopped carrots, green beans, or broccoli on the trivet with about one cup of water in the bottom of the pot. Set it to zero or one minute on high pressure, then quick release as soon as the timer goes off. That’s it. The vegetables stay vibrant and slightly crisp without going mushy.
This method changed how I approached weekday dinners. No more waiting for water to boil or dealing with overcooked vegetables. Everything comes out consistent, and you can season them however you want afterward.
It also works beautifully for potatoes. Whether you need them soft for mashing or slightly firm for roasting later, the Instant Pot handles it easily. Once you start steaming sides like this, you’ll realize how efficient the whole system really is.
Using Pot-in-Pot Method for Layered Meals
The pot-in-pot technique, often abbreviated as PIP, allows you to cook multiple components at once or isolate certain ingredients from the base liquid. At first, it sounded advanced to me. I pictured stacking pans like some expert chef. But after trying it once, I was hooked.
For example, I make steel-cut oats in a small heat-safe bowl set on the trivet, with water underneath in the base. This keeps the oats from sticking and makes cleanup effortless. I’ve also used it to reheat leftovers without drying them out, and even to bake small cakes or frittatas.
Learning how to use an Instant Pot for PIP cooking opened up new ways to meal prep. I sometimes layer rice in one container and steamed veggies in another, cooking them both in one cycle. It saves time and keeps textures and flavors separate.
It’s one of those techniques that looks fancy but quickly becomes part of your normal routine. Once you’ve tried it, you’ll find yourself reaching for those glass bowls or stainless inserts every time you cook.
Taking Control: How to Use an Instant Pot with Manual Settings Instead of Presets
How to use an Instant Pot gets a lot easier when you stop relying on the flashy buttons and start trusting manual settings. The presets might seem helpful at first. Soup, Rice, Bean, Cake they all look tempting when you’re new. I fell for them too. But after a few weird results and mushy textures, I started to wonder if I was better off adjusting things myself. Learning how to use an Instant Pot with manual settings gives you more control, better results, and fewer surprises. Spoiler: I was.
Using manual settings puts you in charge. You decide the cooking time, the pressure level, and whether or not you want to use keep warm mode. It sounds intimidating at first, but once you do it once or twice, it becomes second nature. More importantly, it gives you consistency and flexibility, which the presets often don’t.
Why I Stopped Using Preset Programs
The first time I used the “Rice” button, I expected fluffy, perfect rice. What I got was soggy and overcooked. I tried “Bean/Chili” next. That batch came out undercooked. That’s when I realized something important: presets use pre-programmed times that don’t account for the size, variety, or condition of your ingredients.
If you’re using dry black beans, but the preset is based on canned kidney beans, the result won’t match. The same goes for stew meat that’s too thick or vegetables that break down too easily. Presets are built for averages. But in real cooking, ingredients vary too much for average settings to work every time.
So I stopped using them. Instead, I started reading recipes that gave manual time and pressure instructions. I could fine-tune based on what I was actually cooking. No more guessing. No more strange surprises when I opened the lid.
Customizing Time and Pressure for Better Results
When you learn how to use an Instant Pot manually, you only need a few buttons. Press “Pressure Cook” or “Manual,” then adjust the time with the + or – buttons. If your model has a “Pressure Level” button, you can choose high or low pressure. Most recipes use high by default.
From there, it’s about paying attention to what you’re cooking. Chicken breasts? I go with 10 to 12 minutes. Stew meat? Usually 20 to 25. Rice? I set brown rice to 22 minutes with a natural release. Once I found my own rhythm, I stopped thinking of cooking times as fixed and started treating them like adjustable tools.
You also get to control how your meal finishes. Want to stop the heat immediately? Quick release. Want it to stay warm while you finish something else? Keep Warm does that. The point is, manual control gives you options that presets can’t.
With a little practice, manual mode stops feeling like a risk and starts feeling like freedom. It turns your Instant Pot into something that responds to you, not just something you follow blindly.
From Hesitation to Habit: How to Use an Instant Pot with Confidence Every Day
How to use an Instant Pot no longer feels like a big question once it becomes part of your daily rhythm. I didn’t think I’d say this after my first confusing attempt, but now the Instant Pot is the first thing I turn to when the day feels overwhelming and I still want to eat something decent. What changed wasn’t just my skill level. It was the habit. It was the trust I built with the tool. The real turning point comes when how to use an Instant Pot shifts from something you’re figuring out to something you just do
There’s a moment that happens after you’ve used it ten, maybe fifteen times. You stop second-guessing yourself. You remember the water, the lid, the valve position without needing a checklist. And with that, cooking stops being effortful and starts becoming automatic.
Building Easy Weeknight Routines
My weeknight routine now almost always includes the Instant Pot. Mondays are for shredded chicken with rice or quinoa. Wednesdays, I prep a big pot of chili. Fridays, I toss in frozen meatballs and pasta sauce for a quick no-fuss dinner. The key is keeping ingredients simple and recipes repeatable.
Once I had three or four meals I could make from memory, everything clicked. I didn’t need Pinterest anymore. I didn’t need timers on my phone. I’d press Pressure Cook, set the time, and let it go. During that window, I’d do other things fold laundry, help my kid with homework, answer emails. Cooking became background noise, not the main event.
When you learn how to use an Instant Pot this way, it stops being a gadget and becomes a quiet assistant. One that handles the hard part while you take care of life.
Mistakes I Made (So You Don’t Have To)
I overfilled it once and learned why the max fill line matters. I forgot to set the valve to sealing and wondered why it never pressurized. I added cream before pressure cooking and got a Burn notice. Every mistake taught me something.
But the biggest mistake was hesitating to use it in the first place. For weeks, it sat in my cabinet because I was too intimidated. Once I committed to trying it, even just once a week, that hesitation faded.
There’s nothing special about the people who love their Instant Pot. They’re just the ones who stuck with it through the first awkward learning curve. And now you’re one of them. That simple decision to use it again and again is what separates someone who owns one from someone who actually uses it.

Nutrition Information for Common Instant Pot Beginner Recipes
If you’re learning how to use an Instant Pot and starting with simple beginner recipes, here’s what you can typically expect in terms of nutrition. These are average values for a single serving based on common recipes like shredded chicken, brown rice, vegetable soup, and hard-boiled eggs.
| Recipe | Calories | Protein (g) | Carbs (g) | Fat (g) | Fiber (g) |
| Hard-Boiled Eggs (2 eggs) | 140 | 12 | 1 | 10 | 0 |
| Brown Rice (½ cup cooked) | 110 | 2.5 | 23 | 1 | 1.5 |
| Shredded Chicken (100g) | 165 | 30 | 0 | 4 | 0 |
| Chicken Noodle Soup (1 cup) | 190 | 12 | 16 | 7 | 2 |
| Steamed Broccoli (1 cup) | 55 | 4.5 | 11 | 0.5 | 5 |
| Vegetable Chili (1 bowl) | 280 | 13 | 32 | 9 | 9 |
These numbers can vary depending on ingredients, sauces, and portion sizes. The Instant Pot’s strength is in making nutrient-rich meals quickly, especially when you use whole foods like legumes, lean proteins, and vegetables.
What Not to Trust: A Light Take on “Instant Pot Guides”
While learning how to use an Instant Pot, you might come across all sorts of infographics or button maps online. Not all of them are accurate. In fact, some are downright hilarious. Case in point: this image, which labels the buttons as things like “HIGTE RICK” and “PRANT GRANT.” Tip: always trust your manual over memes.

Conclusion: Start Small, Stay Consistent, and Let the Instant Pot Do the Work
The first time I wondered how to use an Instant Pot, I didn’t expect it would become one of the most reliable tools in my kitchen. And yet, here we are. After trial, error, and a few small wins, it stopped feeling like a challenge and started feeling like second nature.
You don’t need to master every feature on day one. You don’t even need to follow complicated recipes. All it takes is showing up, choosing one simple meal, and letting the Instant Pot prove itself. That’s how the habit starts.
So whether you’re here because your Instant Pot has been sitting unopened on a shelf, or you’ve tried once and weren’t sure it was for you, I’ll say this give it one more honest try. Pick one of the meals we talked about, follow the steps, and see what happens.
Learning how to use an Instant Pot is less about the machine and more about trusting yourself to try again. And once it clicks, cooking might just become the easiest part of your day.
No matter how long it takes, once you know how to use an Instant Pot, you’ll wonder why you waited so long.
More Recipes You’ll Love
- Instant Pot Hard Boiled Eggs – Perfect every time with no guesswork.
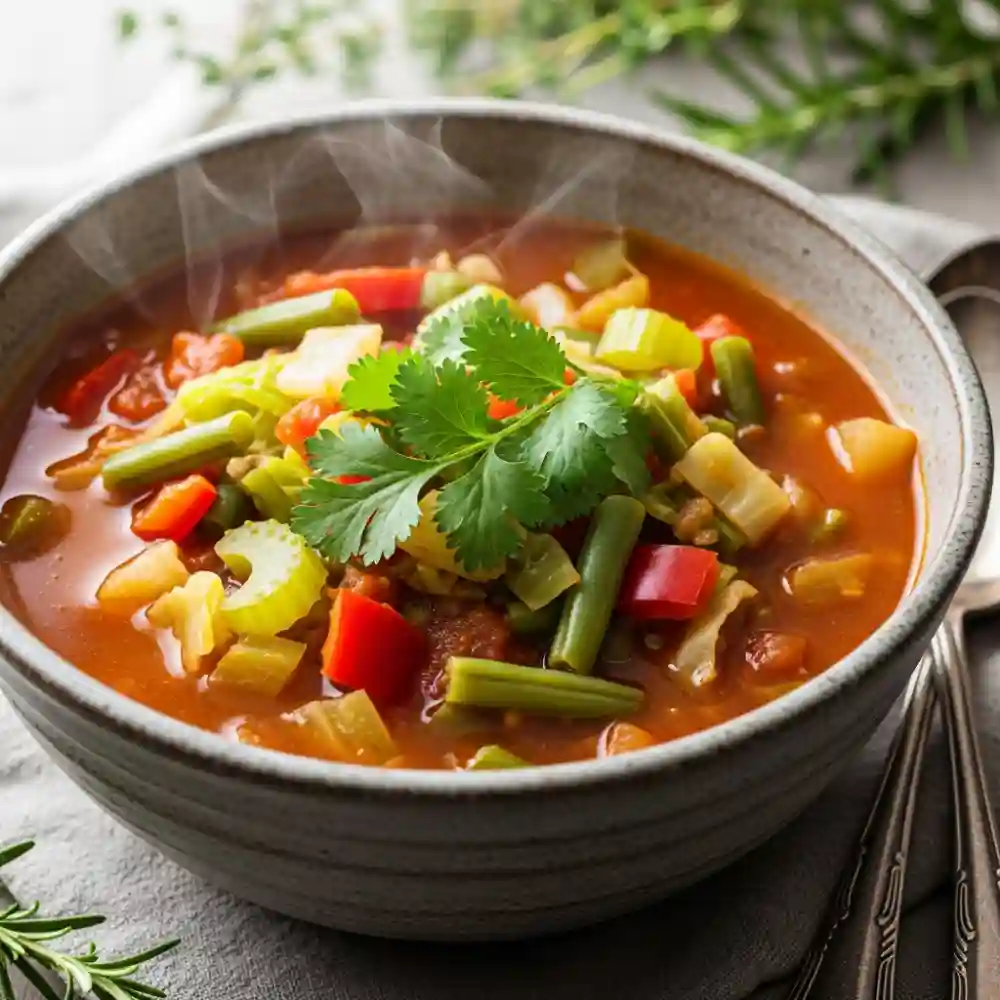
- 7 Day Vegetable Soup Diet Recipe for Weight Loss – Healthy and filling, ideal for batch cooking.
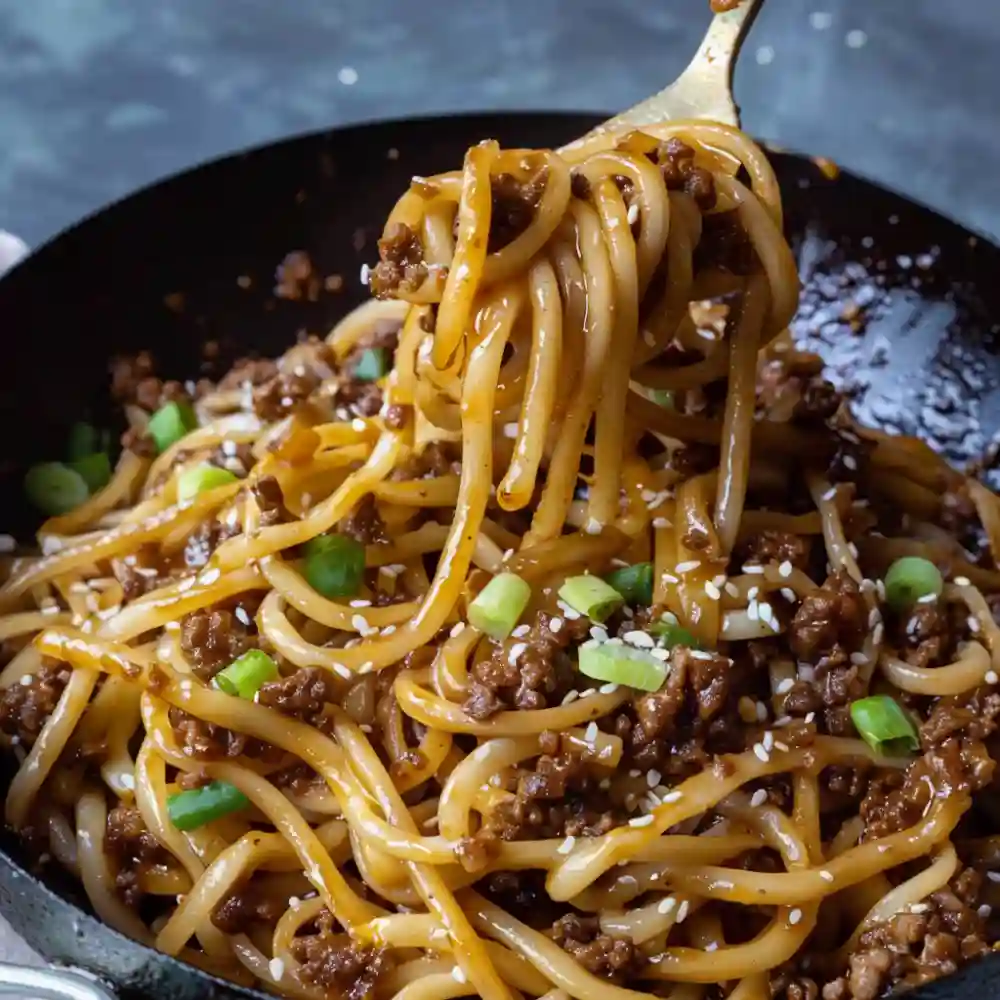
- Mongolian Ground Beef Noodles – A quick and savory one-pot meal.
- Butter Chicken Recipe – Creamy, rich, and made effortlessly in the Instant Pot.
FAQs About How to Use an Instant Pot
1.How much water do I need to add when using an Instant Pot?
Usually, one cup of liquid is enough for pressure cooking. This helps the pot build steam and pressure properly. Some recipes with high-moisture ingredients might need slightly less, but beginners should always start with one full cup.
2. Can I open the lid right after it finishes cooking?
Not immediately. You have to wait for the pressure to release. Either let it release naturally or use the quick release method. You’ll know it’s safe when the float valve drops down. Trying to open it too early is dangerous and will be blocked by the safety lock.
3. What’s the best first meal to make in an Instant Pot?
Many beginners start with hard-boiled eggs, brown rice, or shredded chicken. These are simple, forgiving, and perfect for learning how to use an Instant Pot without stress.
4. Can I cook frozen meat directly in the Instant Pot?
Yes. One of the great benefits of using an Instant Pot is the ability to cook frozen meat safely and evenly. Just make sure you allow a few extra minutes of cook time and that you still include enough liquid.
6. Why does my Instant Pot say “Burn”?
This usually happens when there isn’t enough liquid, or when thick sauces are in contact with the bottom. Always stir sauces into the liquid or add them after pressure cooking. Using the sauté function and not deglazing the pot afterward can also trigger the burn warning.
7. Is it okay to leave food in the Instant Pot on “Keep Warm” for hours?
Yes, but only within reason. Two hours is fine for most meals. Longer than that, the texture may change or the food could dry out. If you’re planning to eat much later, consider transferring the food to a storage container once it cools slightly