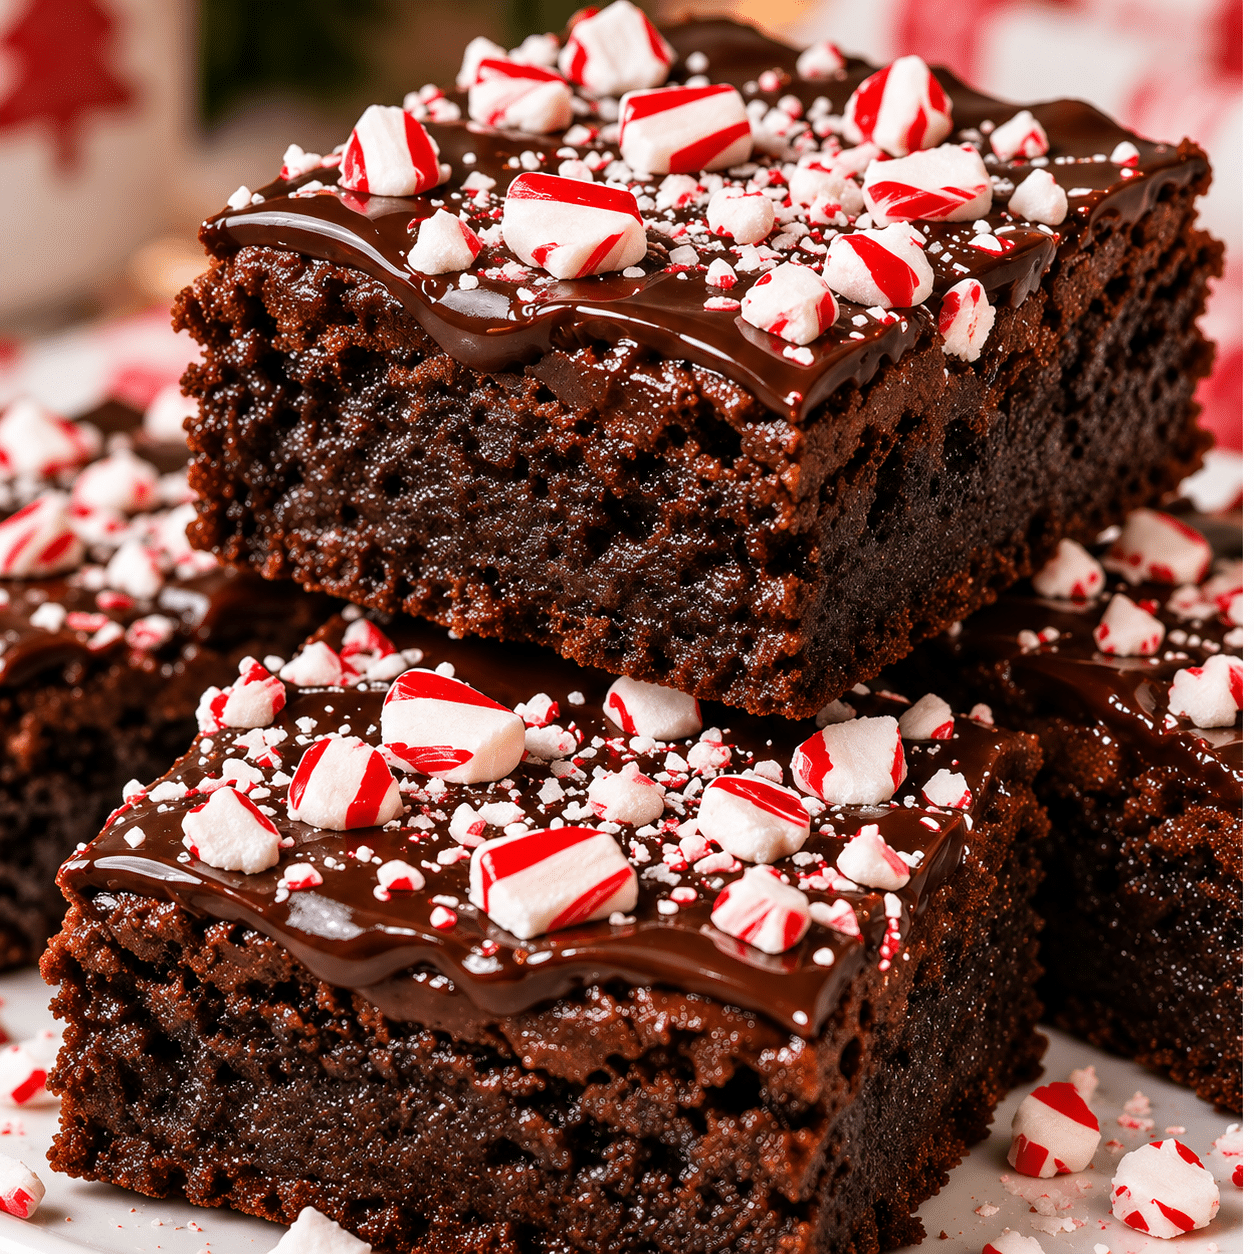
This easy peppermint dessert pairs a cocoa brownie base with a smooth chocolate topping and a sprinkle of crushed candy canes. Slice the pan into small squares for a Christmas dessert tray, or serve larger pieces with coffee after dinner. The batter comes together with a bowl and whisk, making these peppermint brownies a manageable project for a relaxed afternoon of Christmas baking.
Allow time for cooling and setting before you plan to serve them. The hands-on work is simple, but warm brownies need to cool before the ganache goes on. This is a make-ahead choice for holiday desserts rather than a dessert you can finish just before guests arrive.
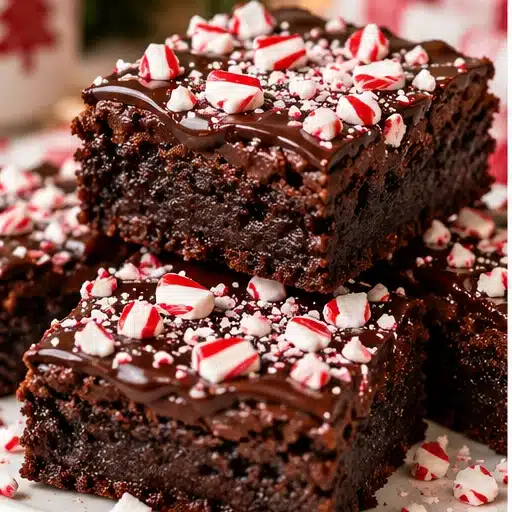
Why Make This Easy Peppermint Dessert?
- No mixer needed: whisk the wet ingredients and fold in the flour.
- A single square pan makes 16 small servings.
- A thin ganache layer adds richness without piping or elaborate decoration.
- The candy topping turns familiar brownies into festive Christmas party desserts.
Ingredients and Helpful Substitutions
The base uses unsalted butter, granulated sugar, eggs, vanilla, peppermint extract, unsweetened natural cocoa powder, all-purpose flour, salt, and chocolate chips. The topping uses semi-sweet chocolate and heavy cream, with crushed candy canes added just before serving.
Use baking peppermint extract, not essential oil. Extract strengths vary, so the recipe starts with a modest half teaspoon in the batter. Avoid substituting spearmint extract, which gives a different flavor. Vanilla rounds out the chocolate without adding extra mint to the ganache.
Spoon flour into the measuring cup and level it, or use the gram amount in the recipe card. Too much flour makes brownies drier. Use unsweetened cocoa rather than hot chocolate mix, which contains added sugar and other ingredients. Chopped chocolate works in place of the chips folded into the batter.
For the ganache, finely chopped baking chocolate melts more easily than large chunks. Heavy cream gives the topping its intended texture; milk is not a direct substitute. Check candy labels if you need to avoid particular allergens.
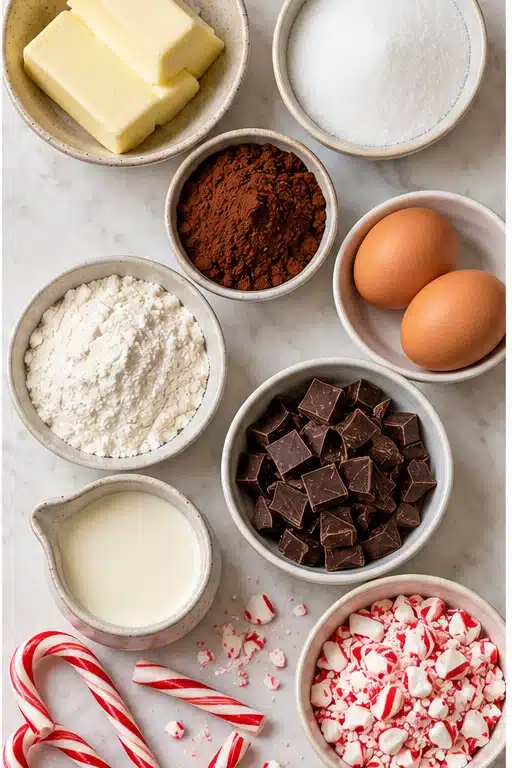
How to Make Peppermint Brownies
1. Prepare the pan
Heat the oven to 350°F (175°C). Line an 8-inch square metal pan with parchment, leaving two sides long enough to lift out the cooled brownies. Lightly grease exposed corners. A metal pan gives more predictable results than glass for this version.
2. Mix the brownie batter
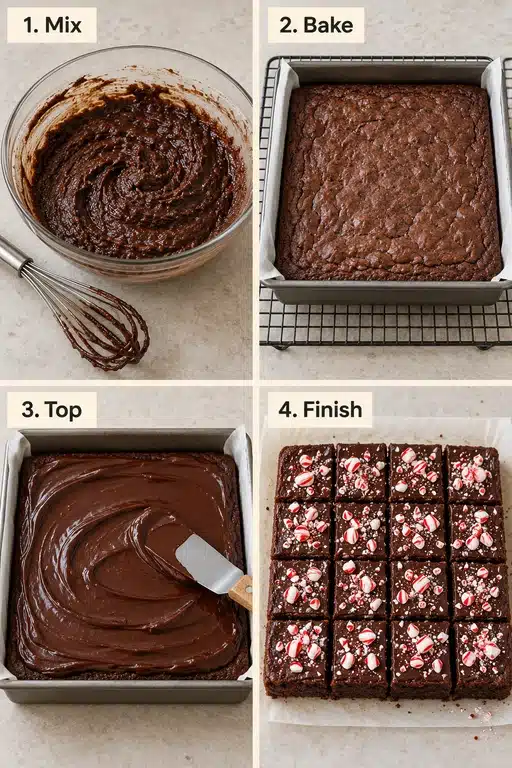
Melt the butter and let it cool until warm. Whisk in sugar, then the eggs, vanilla, and peppermint extract. Stir in cocoa and salt. Fold in flour just until no dry pockets remain, then fold in chocolate chips. Scrape into the pan and smooth the surface.
3. Bake and cool completely
Begin checking at 25 minutes; baking may take about 25–30 minutes depending on your oven. The edges should be set and a toothpick in the center should show moist crumbs without liquid batter. Melted chocolate on the tester can look wet, so check a second spot if necessary. Cool in the pan on a rack, allowing about 90 minutes and longer if the base still feels warm.
4. Add chocolate ganache
Put the finely chopped topping chocolate in a heatproof bowl. Heat cream until steaming, remove from the heat, and pour over the chocolate. Leave for three minutes, then stir gently from the center until smooth. Spread over the cooled brownies and chill until the topping holds its shape, about 30 minutes.
5. Decorate and slice
Sprinkle with crushed candy canes close to serving time for the best crunch. Lift the slab using the parchment. Cut into 16 squares with a sharp knife, wiping the blade between cuts. Let chilled portions stand briefly before serving if you prefer a softer texture.
Tips for Your Christmas Baking
Measure the peppermint carefully: a little extract has a strong effect. Let the butter cool before adding eggs, and stop folding once the flour disappears. Bake until the center has set instead of deliberately leaving raw batter in the middle. The brownies firm as they cool.
If the ganache looks grainy, stir gently while it is still warm. If unmelted chocolate remains, warm the bowl briefly over barely simmering water and stir again, keeping water out of the bowl. Do not spread it on a warm brownie base, where it can run into the edges.
Serving Ideas for a Holiday Dessert Table
For simple Christmas desserts, place the squares in paper candy cups on a platter. Balance their chocolate flavor with fresh fruit or a less rich cookie. For a dessert plate, add a small scoop of vanilla ice cream and scatter a few candy crumbs over the top at the table.
If you are comparing quick Christmas desserts, remember that these take only about 15 minutes of preparation but need cooling time. Bake the base ahead and finish the topping when your schedule allows. Keep portions small when serving alongside other sweets.
Make-Ahead Notes
Keep the finished brownies covered in the refrigerator and plan to enjoy them within three days. Add candy just before serving because moisture softens it and may cause the color to bleed. For longer preparation ahead, freeze the untopped, fully cooled brownie base tightly wrapped, then thaw before adding fresh ganache and candy.
Understanding the Texture
These brownies are designed to be dense and fudgy rather than light and cakey. The relatively small amount of flour keeps the crumb tender, while melted butter gives the chocolate a smooth, rich texture. Sugar does more than sweeten the batter: it also holds moisture as the brownies cool. That is why a brownie that looks slightly soft when it leaves the oven can become perfectly sliceable after it rests.
Do not judge doneness only by the color of the top. Cocoa makes the surface dark before the center is ready, and the chocolate chips can leave shiny marks on a toothpick. Look for set edges, a center that no longer jiggles like liquid, and a few moist crumbs on the tester. If you prefer very clean, firm squares, chill the baked base before adding the topping. If you prefer a softer bite, let the finished brownies stand at room temperature for 15 to 20 minutes before serving.
The ganache also changes as it cools. Warm ganache is fluid and glossy, chilled ganache is firm and neat, and room-temperature ganache becomes creamy again. This makes the dessert easy to adapt to your serving plan. For a buffet, chill longer so the squares hold their edges. For a plated dessert, allow a short rest so the chocolate topping is easier to cut with a fork.
Ingredient Notes for Reliable Results
Butter and sugar
Melt the butter gently and allow it to cool until it feels warm rather than hot. Very hot butter can partially cook the eggs when they are added. Whisk the sugar into the butter until the mixture looks glossy. You do not need to dissolve every grain, but an even mixture helps the brownies bake consistently from edge to center.
Eggs
Large eggs provide structure and moisture. Add them one at a time and whisk only until blended. Excessive whisking incorporates air, which can make the brownies puff in the oven and then sink as they cool. A small amount of lift is fine; the finished texture should still be compact.
Cocoa powder and flour
Natural cocoa powder contributes a deep chocolate flavor to this batter, which contains no baking powder or baking soda. If you use Dutch-process cocoa, the flavor will be milder and the color may be darker. Weighing the flour is the most accurate method. If you measure by volume, fluff the flour, spoon it into the cup, and level it without packing it down.
Chocolate chips
Chocolate chips create little pockets of melted chocolate in the crumb. Semi-sweet chips balance the sweet topping, while dark chips make the dessert taste more intense. Mini chips distribute more evenly; chopped chocolate creates irregular pools. Keep the chips at room temperature so they do not cool the batter too quickly when folded in.
Peppermint extract
Peppermint extract is concentrated, so measure it carefully. The candy topping adds additional mint flavor and aroma. If you want a gentler result, use a quarter teaspoon in the batter and rely on the candy canes for the finish. If you want a stronger winter flavor, keep the full amount in the recipe but avoid adding extra extract to the ganache unless you have tasted it first.
Common Problems and How to Fix Them
The center is still liquid
If the center is genuinely liquid rather than softly set, return the pan to the oven for five minutes and check again. Ovens vary, and a light-colored or glass pan can change the timing. Let the brownies cool fully before deciding they failed; residual heat continues to set the middle. Do not add ganache to a liquid center because the topping will make clean slicing more difficult.
The brownies are dry
Dry brownies usually come from too much flour or too much baking time. For the next batch, weigh the flour and begin checking early. Make sure your oven is not running hot by using an inexpensive oven thermometer. Once baked, a thin layer of ganache and a small scoop of ice cream can make slightly dry brownies enjoyable, but the best solution is accurate measuring and early checking.
The ganache is grainy
Grainy ganache can happen when the chocolate is overheated or when the cream is not warm enough to melt it evenly. Chop the chocolate finely and let the hot cream sit over it for three minutes before stirring. Stir from the center outward with a spatula. If needed, set the bowl over warm water for a short time, keeping steam and water away from the chocolate.
The layers separate
Ganache may slide if it is spread over a warm brownie or if the surface is greasy. Cool the base completely and blot away any visible butter before topping. Chill the finished layer until it is set. The topping does not need to be thick; a modest layer adheres better and keeps the peppermint candy visible.
The candy canes become sticky
Peppermint candy absorbs moisture from the refrigerator and from humid air. Crush the candy shortly before serving and sprinkle it over the chilled ganache. If you need to prepare the dessert earlier, reserve some candy for the final garnish and keep it in a dry, airtight container.
Variations on This Peppermint Brownie Recipe
For a darker chocolate profile, replace half of the semi-sweet chips with bittersweet chocolate. For a sweeter version that children often enjoy, use milk chocolate in the ganache and reduce the candy topping slightly. White chocolate ganache creates a snowy finish, but it is sweeter and softer than the semi-sweet topping, so chill it longer before cutting.
You can add a thin layer of crushed peppermint between the brownie and the ganache, but use a light hand. A thick layer can make the squares difficult to cut and may cause the topping to lift. Toasted nuts are another option for adults, although they change the texture and may be unsuitable for a mixed holiday dessert table. If you add nuts, sprinkle them over the ganache while it is still soft.
For peppermint mocha brownies, stir one teaspoon of instant espresso powder into the cocoa. Espresso does not make the dessert taste like coffee when used in a small amount; it strengthens the chocolate flavor. For a marbled finish, reserve two tablespoons of plain ganache, drizzle it over the peppermint-topped layer, and gently drag a toothpick through the lines before chilling.
If you need smaller bites for a cookie exchange, bake the batter in the same pan and cut it into 24 pieces. The pieces will be thinner to eat but will still have the same fudgy texture. For a larger plated portion, cut 9 squares and serve them with whipped cream. Adjust the serving size rather than changing the ingredient proportions, since changing the pan can alter the bake.
Planning a Christmas Baking Day
Start by lining the pan and crushing the candy canes. Prepare the brownie batter while the oven heats, then wash the mixing bowl while the base bakes. Once the pan is on the cooling rack, make the ganache only when the base is no longer warm. This order keeps the kitchen calm and prevents the most common timing mistake: spreading ganache on a hot brownie.
For a holiday party, bake the base the evening before. Cover it after it has cooled, then make and spread the ganache the next day. Keep the finished pan chilled until about 20 minutes before serving. Cut the squares just before placing them on the platter. A sharp knife and a quick wipe between cuts will keep the red-and-white candy topping bright instead of smearing it across the chocolate.
For a cookie box, choose small squares and place a piece of parchment between layers. Avoid sealing the box while the brownies are warm. If the box will travel, chill the brownies first so the topping stays firm. Pack them away from strongly scented foods because chocolate and peppermint can absorb nearby aromas.
How to Store and Freeze Them
Store the finished brownies in a covered container in the refrigerator for up to three days. Separate layers with parchment so the candy does not scrape off the ganache. The texture is richest after the brownies sit at room temperature for a short time, but do not leave them in a warm room for several hours because the ganache will soften.
To freeze the brownie base, cool it completely and wrap it first in parchment and then in a freezer-safe bag. Freeze it flat for up to one month for the best texture. Thaw it in the refrigerator overnight, then add freshly made ganache and candy. Freezing the decorated brownies is possible, but the candy canes may become dull and sticky after thawing, so decorating after thawing gives a better result.
Serving and Presentation Ideas
Use a white platter to make the dark chocolate and peppermint colors stand out. Arrange the squares in a simple grid or place them in small paper cups. A few whole candy canes beside the plate make the flavor clear without adding extra decoration. For a more elegant dessert, dust the plate with cocoa and add a small spoonful of lightly sweetened whipped cream.
These brownies are rich, so a small serving is satisfying. Offer coffee, black tea, hot cocoa, or a glass of cold milk. If the rest of your dessert table is very sweet, pair the brownies with fresh raspberries or orange segments for a bright contrast. Keep the garnish restrained: the peppermint pieces already provide color, crunch, and a festive finish.
Small Details That Make a Difference
Use parchment with a little overhang so you can lift the entire slab without turning it upside down. Let the pan cool on a wire rack rather than a solid countertop, where trapped heat can keep the center soft for longer. When you cut the brownies, press the knife straight down instead of sawing. This protects the ganache and keeps the edges of each square sharp.
If you are serving children, check the candy pieces before sprinkling them over the pan. Very large shards can be hard to bite, so aim for a mixture of fine crumbs and pieces no larger than a pea. For guests with dietary restrictions, label the platter clearly and check each chocolate package for shared-facility warnings. The recipe contains dairy, eggs, gluten, and usually soy, depending on the chocolate you select.
Finally, taste one small edge piece before arranging the platter. It lets you check the peppermint level and gives you a chance to adjust the garnish with a few extra candy crumbs. A successful holiday bake is as much about timing and presentation as it is about the ingredient list.
Conclusion
This easy peppermint dessert brings together rich chocolate, a smooth ganache topping, and a festive candy cane crunch. Make the brownie base ahead, give it plenty of time to cool, and add the crushed candy close to serving. With a little planning, these peppermint brownies fit neatly into your Christmas baking schedule and make an inviting addition to a holiday dessert platter.
Easy Peppermint Dessert FAQs
Can I use a boxed brownie mix?
Yes. Prepare a mix intended for an 8-inch pan according to its own instructions and baking time. Add peppermint only if the mix is not already flavored, then cool fully before using the topping below. Yield and timing will follow the mix you choose.
Can I double the recipe?
Two separate 8-inch pans are the easiest way to keep the same thickness and checking time. A larger pan changes the bake, so do not assume the timing stays the same.
Can I leave out the peppermint extract?
Yes. The candy garnish will still give a little mint flavor, while the base tastes like a classic cocoa brownie. You can also leave off the candy for plain chocolate brownies.
Are these the same as Peppermint Crisp desserts?
No. This recipe uses peppermint extract and crushed candy canes. Peppermint Crisp is a different confection and is not required here.
Can I serve them warm?
The topped brownies slice best once cooled and set. For a warm chocolate dessert, serve the plain brownie base with a spoonful of freshly made ganache instead of expecting neat topped squares.
Easy Peppermint Dessert Recipe
Easy Peppermint Dessert: Chocolate Brownies
Ingredients
Method
- Heat oven to 350°F (175°C). Line an 8-inch square metal baking pan with parchment, leaving an overhang. Lightly grease exposed corners.
- Whisk warm melted butter with sugar. Whisk in eggs, vanilla, and peppermint extract. Stir in cocoa and salt. Fold in flour just until combined, then chocolate chips.
- Spread batter in pan. Bake 25–30 minutes, checking at 25 minutes. Edges should be set and a toothpick in the center should show moist crumbs without liquid batter.
- Cool completely in the pan on a rack, about 90 minutes or longer as needed.
- Place chopped chocolate in a heatproof bowl. Heat cream until steaming and pour over chocolate. Let stand 3 minutes, then stir smooth. Spread over fully cooled brownies.
- Refrigerate about 30 minutes, until topping holds its shape. Add crushed candy canes near serving time. Lift out and cut into 16 squares.
Notes
More Easy Christmas Dessert Ideas
- Peppermint bark for a no-bake candy option.
- No-bake peppermint dessert for another minty addition to the table.
- Hot chocolate lasagna for a chilled chocolate dessert.
For another approach to chocolate and mint, see Kroll’s Korner’s peppermint brownies, the inspiration for this holiday dessert topic. The recipe here uses a separate cocoa-brownie formula; it has not been kitchen-tested for A Whimsy Plate.