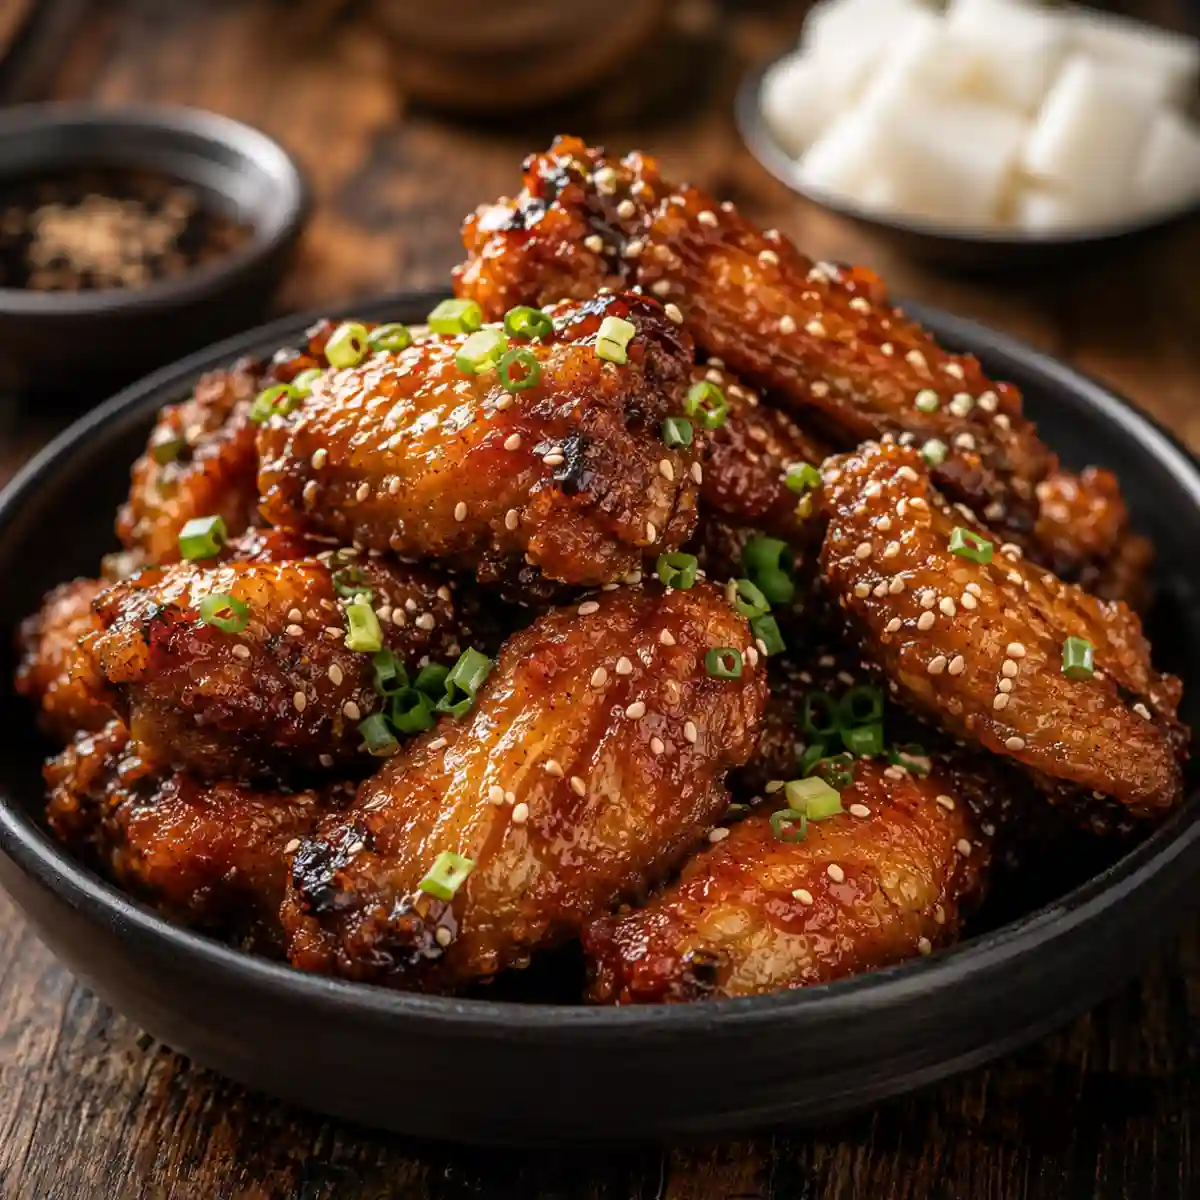
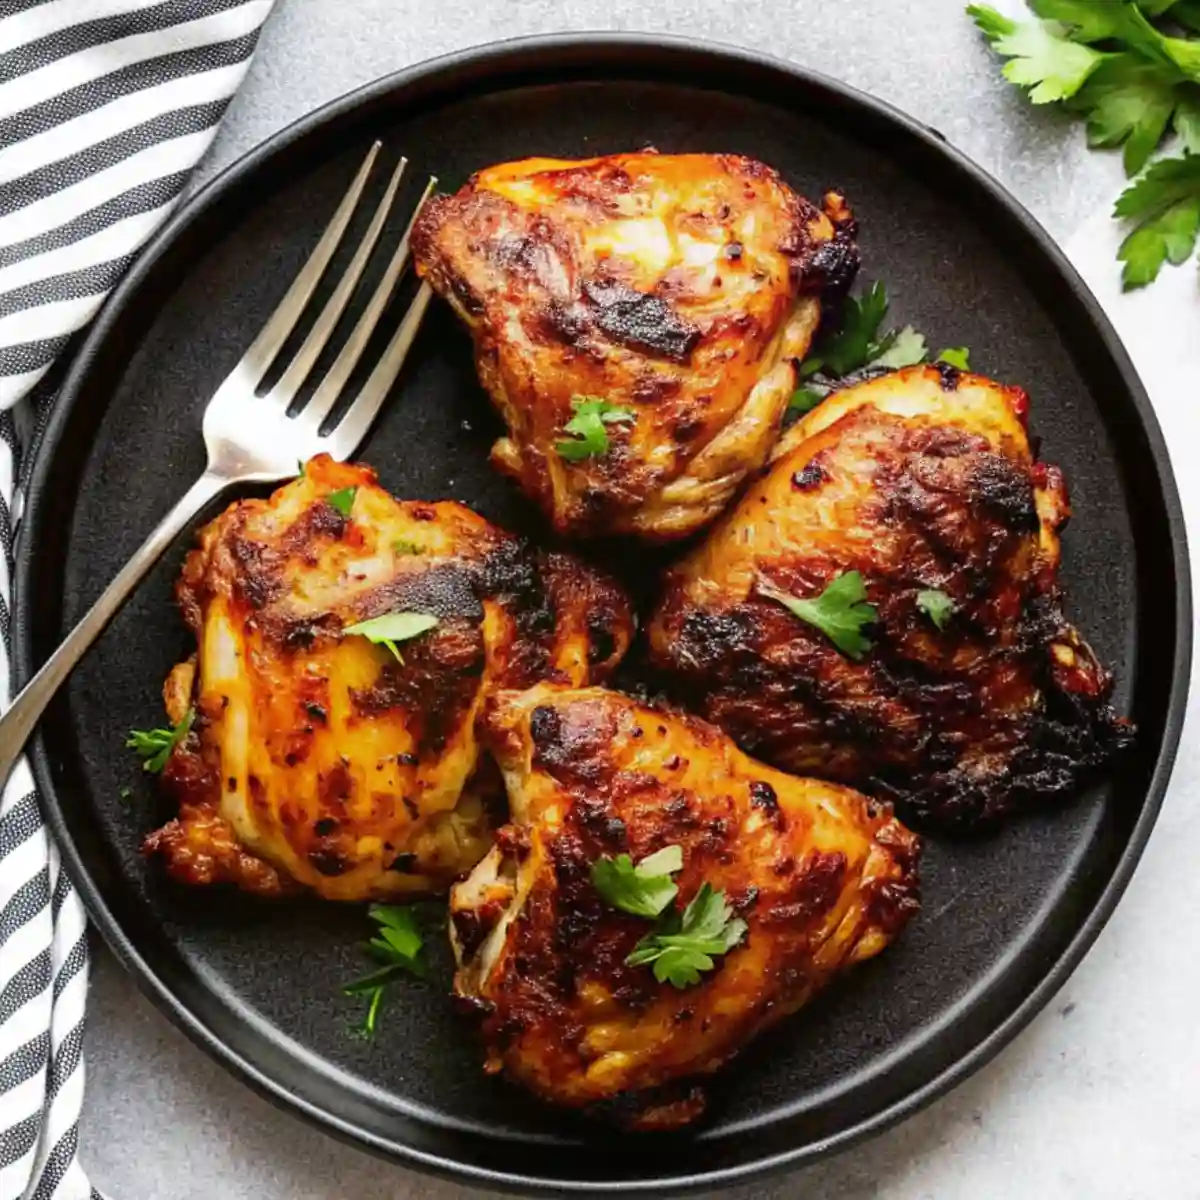
Maple Glazed Chicken Thighs are sticky, juicy, sweet-and-salty, and perfectly caramelized. The first time I made them, I couldn’t decide how to cook them. Should I bake them? Try the air fryer? Or just use the skillet? I tested all three methods and found that each one brings out something special in the chicken.
If you’re searching for the best Maple Glazed Chicken Thighs recipe but don’t know which cooking method to trust, this guide has you covered. You’ll get one simple master glaze and step-by-step instructions for baking, air frying, or using the stovetop. Plus, I’ll show you how to add flavor variations to match any craving.
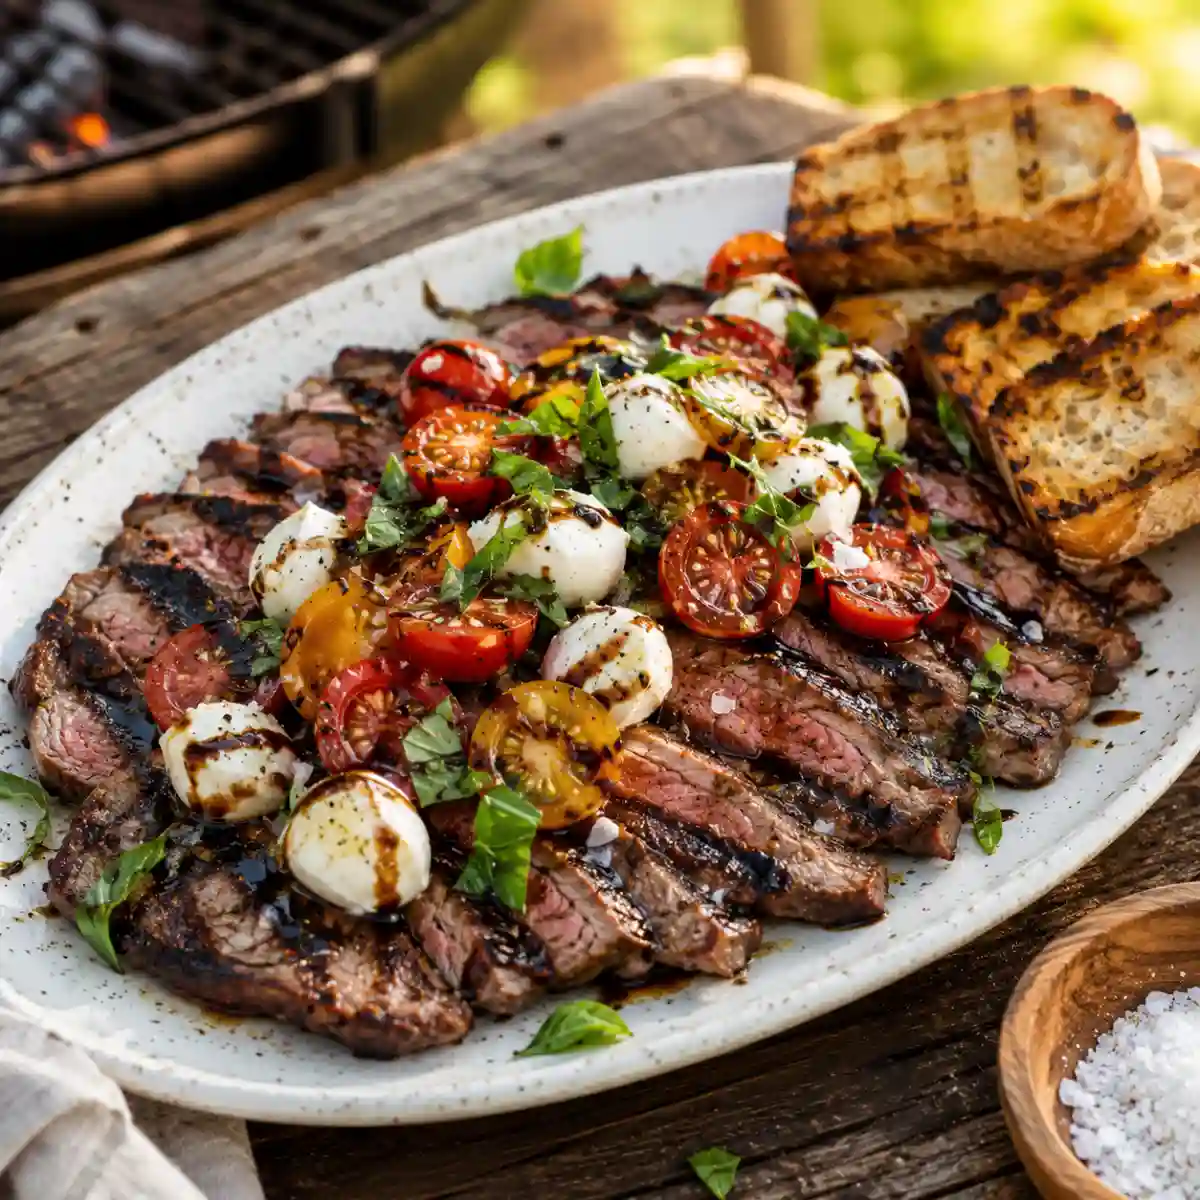
Explore more warm and wholesome Fall Chicken Dinner Ideas perfect for weeknights.
Table of Contents
Table of Contents
Why These Maple Glazed Chicken Thighs Are All You Need
You don’t need five different recipes to make perfect maple glazed chicken thighs. This one gives you everything from fast stovetop meals to crispy air fryer results.
Versatile
Cook your maple glazed chicken thighs in the oven, on the stovetop, or in the air fryer. Pick the method that fits your time and tools.
Fast and Easy
The stovetop version puts dinner on the table in just 20 minutes, making these chicken thighs perfect for busy nights.
Pantry Ingredients
This recipe uses simple ingredients you likely already have at home. No special shopping trip needed.
Foolproof Results
Want that sticky glaze that clings perfectly to juicy chicken? These steps will make sure your maple glazed chicken thighs come out right every single time.
The Core Ingredients for the Perfect Maple Glaze
Nailing the glaze is what makes maple glazed chicken thighs unforgettable. You only need a few simple ingredients to create that sweet, sticky, well-balanced coating.

The Master Glaze Ingredients
Real Maple Syrup
This is the heart of every good batch of maple glazed chicken thighs. Always use real maple syrup for rich, natural sweetness.
Apple Cider Vinegar
It cuts through the sweetness and adds a tangy balance that keeps the glaze from tasting flat.
Soy Sauce or Tamari or Coconut Aminos
These options bring salt and savory depth. Coconut aminos work great if you’re keeping it gluten-free or paleo.
Garlic
Freshly minced garlic gives the glaze its bold base flavor. It’s a key component in the taste of maple glazed chicken thighs.
Olive Oil and Sesame Oil
Olive oil smooths out the texture. Sesame oil adds a nutty flavor that pairs well with soy and maple.
Choosing Your Chicken: Bone-in or Boneless
Boneless, Skinless Thighs
They cook faster and absorb flavor quickly. Perfect for stovetop or oven use when you need a quicker meal.
Bone-in, Skin-on Thighs
These stay juicy and develop the crispiest skin, especially in the air fryer. They take a little longer but deliver great texture.
How to Make Maple Glazed Chicken Thighs Three Ways
Whether you want crispy skin, a quick skillet dinner, or a hands-off oven bake, these maple glazed chicken thighs adapt to your schedule and your kitchen tools.
Method 1: Stovetop or Skillet (The 20-Minute Meal)
This version is perfect when you need dinner fast but still want big flavor.
- Heat oil in a large skillet over medium heat.
- Season chicken thighs with salt and pepper.
- Sear skin-side down for 5 to 7 minutes until golden.
- Flip and cook another 5 minutes until nearly done.
- Pour in the maple glaze and increase heat slightly.
- Let it bubble and reduce, stirring now and then, until sticky and thick.
Pro Tip: Make the Glaze Stick
Let the glaze reduce uncovered so the moisture evaporates. This is key for that shiny, sticky finish on stovetop maple glazed chicken thighs.
Method 2: Baked in the Oven (The Classic)
Great for when you want easy cleanup and a set-it-and-forget-it method.
- Preheat oven to 425°F.
- Arrange chicken thighs on a lined baking tray.
- Brush both sides with the glaze.
- Bake 25 to 30 minutes for boneless or 35 to 40 minutes for bone-in.
- Finish under the broiler for 2 to 3 minutes for caramelized skin.
Pro Tip: No Pale Chicken
That short broil step gives your baked maple glazed chicken thighs rich color and sticky texture.
Method 3: Air Fryer (The Crispiest Skin)
For fans of crispy skin and fast cooking, this is your best pick.

- Preheat air fryer to 380°F.
- Add 1 teaspoon baking powder to the dry rub before adding the glaze.
- Coat the chicken with glaze and place skin-side up in the air fryer.
- Cook for 20 to 22 minutes, flipping once if needed, until cooked through and glazed.
Pro Tip: The Crispy Skin Trick
Baking powder helps draw out moisture and creates ultra-crispy skin while locking in the sweet glaze.
Looking for a quicker cooking method? Try these Air Fryer Chicken Thighs for a crispy finish with minimal effort.
Maple Glazed Chicken Thighs
Ingredients
Method
- Heat oil in a skillet over medium heat.
- Season chicken and sear skin-side down for 5 to 7 minutes.
- Flip and cook another 5 minutes.
- Add glaze, let it bubble and reduce until thick and sticky, about 5 to 8 minutes.
- Preheat oven to 425°F.
- Arrange chicken on a lined pan and brush with glaze.
- Bake 25 to 30 minutes for boneless, 35 to 40 minutes for bone-in.
- Broil 2 to 3 minutes to caramelize the glaze.
- Preheat air fryer to 380°F.
- Mix baking powder with dry seasoning, then coat chicken in glaze.
- Cook for 20 to 22 minutes until crispy and fully cooked.
Notes
- Calories: 280 to 320 kcal
- Protein: 22 to 25 g
- Fat: 12 to 15 g
- Saturated Fat: 2 to 3 g
- Carbohydrates: 16 to 18 g
- Sugars: 13 to 15 g
- Fiber: 0 g
- Sodium: 550 to 700 mg
- Cholesterol: 90 to 100 mg
- Bone-in, skin-on thighs add 30 to 50 extra kcal per serving.
- Coconut aminos reduce sodium if used instead of soy sauce.
- Final nutrition depends on how much glaze is retained after cooking.
Flavor Variations to Customize Your Maple Glazed Chicken Thighs
Once you’ve mastered the base recipe, you can easily change the flavor by adding just one or two ingredients. These variations help you keep things interesting while still using the same maple glaze.
Maple Dijon Chicken
Add 2 tablespoons Dijon mustard to the glaze.
The mustard brings a smooth, tangy kick that balances the maple perfectly.
Maple Soy Chicken (Asian-Style)
Add 1 tablespoon hoisin sauce to the glaze.
This twist adds savory depth and gives your maple glazed chicken thighs a sweet and salty profile that pairs well with rice or noodles.
Maple Garlic Ginger Chicken
Add 1 tablespoon fresh grated ginger along with the garlic.
This version has a bold, aromatic flavor and works especially well for fans of sharper spice notes.
Spicy Maple Chicken
Add half a teaspoon red pepper flakes or a few dashes of your favorite hot sauce.
The spice cuts through the sweetness and gives the glaze a gentle burn without overpowering the dish.
What to Serve With Maple Glazed Chicken Thighs
The sweet and savory flavors of maple glazed chicken thighs pair well with both comforting starches and fresh vegetables. Here are some easy ideas to complete your meal.
Starches
- Garlic fried noodles
- Steamed jasmine or brown rice
- 10-minute peanut noodles
- Creamy mashed potatoes or sweet potato mash
Vegetables
- Balsamic spinach
- Roasted green beans with garlic and olive oil
- 10-minute garlic kale
- Glazed carrots or sautéed zucchini
These sides balance the richness of the glaze and keep the whole plate satisfying and well-rounded.
Storage, Freezing, and Reheating Instructions
Whether you’re meal prepping or saving leftovers, maple glazed chicken thighs keep well with the right steps.
To Store
Place cooled maple glazed chicken thighs in an airtight container. Keep in the refrigerator for up to 4 days. Avoid storing in containers with too much liquid to maintain glaze thickness.
To Freeze (Meal Prep)
Freeze raw chicken with the maple glaze in a sealed freezer bag. Lay flat for easy storage. It will last up to 2 months.
Cooked leftovers can also be frozen. Let them cool completely, then wrap tightly or store in a freezer-safe container.
To Reheat
Skip the microwave if you want to keep the glaze sticky and the skin crispy.
Reheat in the oven at 350°F for 10 to 15 minutes or in the air fryer at 350°F for 5 to 8 minutes. This keeps the glaze intact and the chicken juicy.
For additional nutrition details, see the official USDA database entry for chicken thighs:
Conclusion
Maple-glazed chicken thighs are the kind of meal that always hits the spot. Whether you’re cooking on the stovetop in a rush, baking a tray for the family, or using the air fryer for that perfect crispy skin, this guide gives you everything you need.
You get one master glaze, three cooking methods, and plenty of flavor variations to keep things fresh and exciting. It’s fast, flexible, and foolproof.
If you tried this recipe, leave a comment below and give it a star rating. I’d love to hear which method or flavor you used.
Tried a twist of your own? Let us know what worked for you.
And don’t forget to share this with friends or save it to your Pinterest board for later.
Our full [Fall Dinner Ideas Guide] is coming soon — packed with comforting recipes for every autumn night. Stay tuned!
More fall favorites to try:
• Love one-pan meals? Don’t miss our [One Pan Chicken and Butternut Squash].
• For a cozy twist, try the [Creamy Pumpkin Chicken Pasta].
• Our [Apple Cider Braised Chicken] is another sweet and savory classic.
• Need something more veggie-forward? Check out [Roasted Chicken with Autumn Vegetables].
FAQs
Maple Glazed Chicken Thighs
The key is to let the glaze reduce while cooking. After pouring it over the chicken or into the pan, turn up the heat slightly and let it bubble. The glaze will thicken as the water cooks off, creating that sticky texture that coats the chicken beautifully. Stir occasionally to prevent burning and stop once the glaze clings to the spoon.
2. How long do chicken thighs take to bake?
Boneless, skinless thighs usually take about 25 to 30 minutes in a 425°F oven. Bone-in, skin-on thighs take a bit longer, closer to 35 to 40 minutes. Always check that the internal temperature reaches 175°F for juicy results. To add color and caramelization, finish under the broiler for two to three minutes.
3. What to serve with maple chicken?
Great side dishes include garlic fried noodles, steamed rice, roasted green beans, balsamic spinach, or mashed potatoes. These sides balance the sweet and salty glaze without clashing with the flavor.
4. How do you store glazed chicken thighs?
Cool the chicken completely before transferring it to an airtight container. Store in the fridge for three to four days. If freezing, you can freeze raw thighs in the glaze or freeze cooked leftovers in freezer-safe bags or containers. Thaw in the fridge overnight before reheating.
5. What is the difference between a glaze and a sauce?
A glaze is thick, sticky, and clings to the food. It’s often cooked down to reduce moisture. A sauce is usually thinner and may stay more liquid after cooking. Glazes are used to coat and caramelize, while sauces often pool around the food or are served on the side.
6. What are the three main ingredients in a glaze?
Every good glaze includes a sweetener, an acid, and something salty or savory. In this recipe, the maple syrup adds sweetness, apple cider vinegar adds acidity, and soy sauce or coconut aminos bring the salty balance.
7. Does a glaze have to be cooked?
Yes, in most cases it should be. Cooking helps thicken the glaze and allows the flavors to blend. For stovetop and baked versions, the glaze reduces naturally during the cooking process. This step is what makes the glaze turn sticky and cling to the chicken.
8. How long do chicken thighs stay ok not in the fridge?
Cooked chicken should not sit out at room temperature for more than two hours. After that, bacteria can grow quickly. If it’s hot outside, that time drops to about one hour. Always refrigerate promptly for food safety.